


Why do I need to polish the vector art?
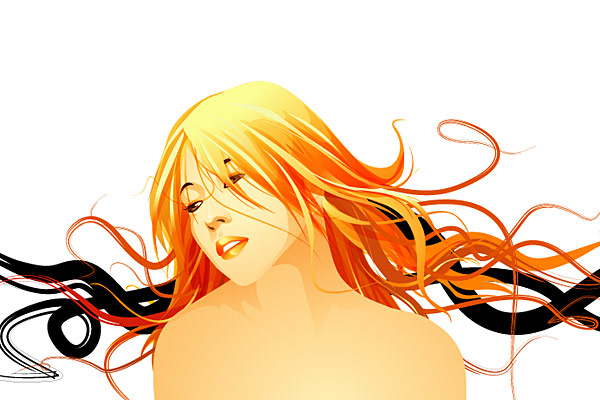
Vector artworks are usually very flat, dull, and lack visual effects due to software limitations; thus they look very boring. Unless you want that "flat and dull" appearance, otherwise you should polish your vector in Photoshop. By polishing vector art, you can: make the color more vivid, bring up the contrast, texturize the artwork, and add more life and depth to the image. Here are some of my work samples (before and after polish).


Technique 1: Lens Flare Effect

First technique, let’s start with one of my recent work on Next2Friends. I will show you how to create a stunning lens flare effect in two simple steps.
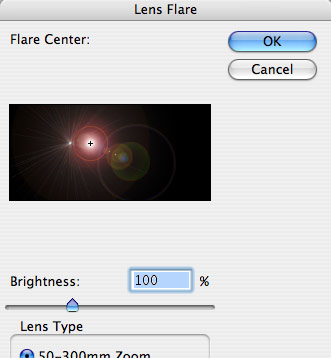
I assume you have the vector artwork ready and you want to add a lens flare layer on top. First create a new layer on top and fill it with black color. Go to Filter > Render > Lens Flare. Then, set the layer’s blending mode to Screen. Done. Isn’t that nice and easy?
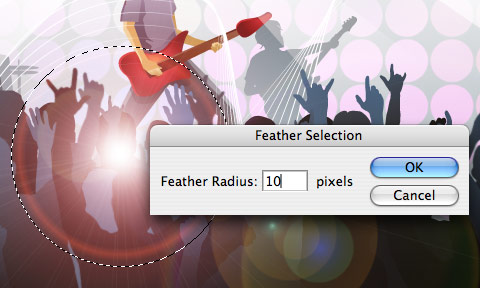
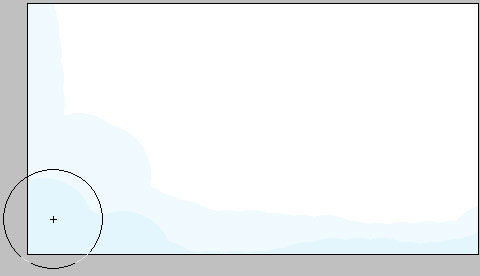
If you want the lens flare to focus on specify area only, you can delete the unwanted area. Make a circle selection, feather the selection (Cmd + Opt + D) by 10 to 20px, inverse selection (Cmd + Shift + i), and hit Delete key.
Sometime just the Lens Flare filter alone is not good enough. You can make it even better by manually adding more colorful circles and glows.

Technique 2: Colorful and Dusty Effect
This is one of my common styles that can be found in most of my design work. Again, it is very easy. It can be done in two easy steps.
Use the Radial Gradient tool, randomly draw some soft edge glows on a layer and set the layer blending mode to Dissolve.

Repeat this step and create different color overlapping layers. Try to use bright colors such as yellow, megenta and cyan. Tips: you can control the dissolve level by adjusting the layer Opacity.

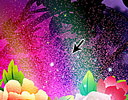
Technique 3: Rainbow

If you ever wondered how I did the rainbow effect on my Phoenix illustration (currently displaying on N.Design Studio). It is done by a Photoshop plugin, Polar Coordinates.
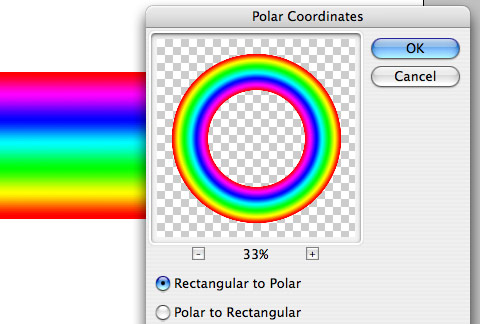
Create a new square dimension file (ie. 800 x 800px). Make a spectrum gradation in the middle of the document using the Gradient tool with the default "Spectrum" preset. Go to Filter > Distort > Polar Coordinates. There you go, a perfect circle spectrum!
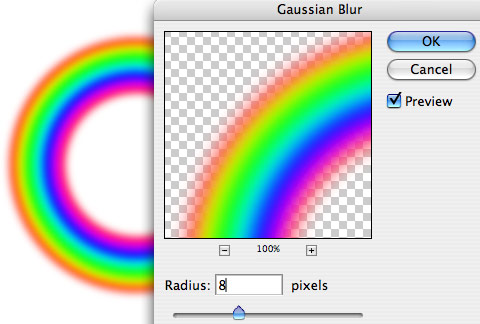
Now, you have to blur the sharp edge. Go to Filter > Blur > Gaussian Blur, apply 5 to 10px radius, depending on the size of your document. Bigger document size will require more blur.
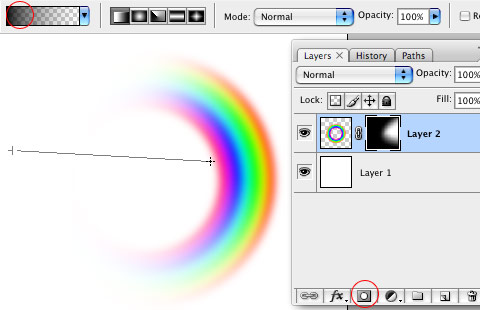
If you only to show partial of the rainbow, you can use the layer mask to hide the unwanted area. In the Layer palette, click on the "Add layer mask" icon. Use Gradient tool, select the "black to transparent" swatch, drag from left to right to mask out the unwanted area.
Technique 4: Glowing Lights - Background
This is the quickiest and most easiest way to create a colorful light glowing background for your vector work.

First fill the layer with any dark gradient you desire. Use the Radial Gradient tool and start making soft (transparent) glows on separate layers. This effect works best with cyan, magenta, and purplish colors.

Experiment with the blending modes and drag the layers around (you will get unexpected results): Overlay, Color, Multiply, Screen, and Color Dodge.

Technique 5: Particles

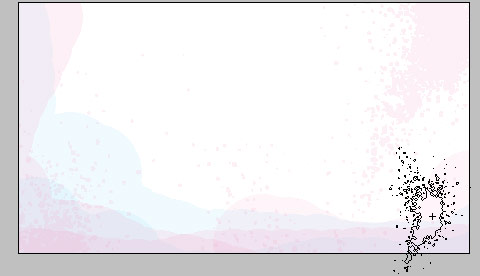
Particle Tail
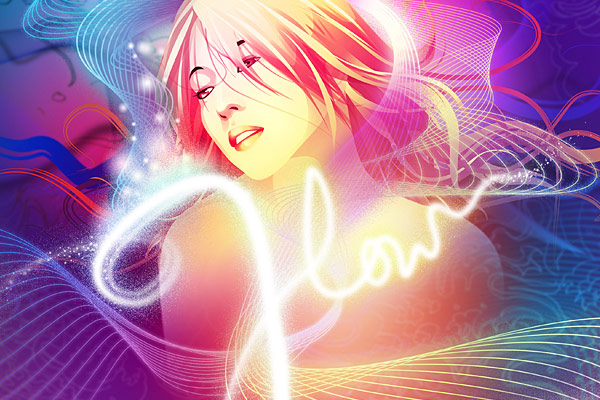
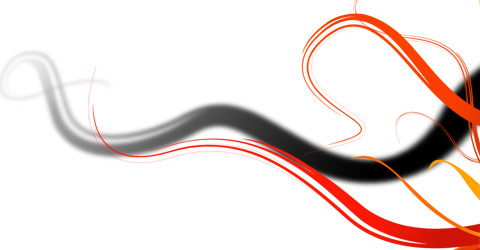
Here is a technique on how to create a tail of particles as seen in my Flow artwork. This technique is also commonly used in the fairy tale books/movies (you know, the typical magic wand effects).
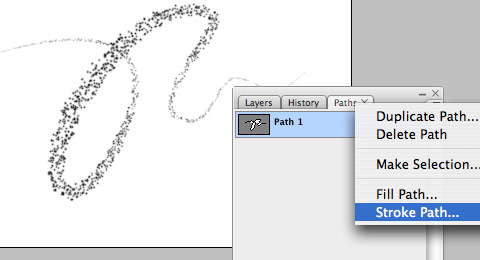
Select the Pen tool, and draw an opening path. Select the Brush tool, set any brush size you want (ie. Brush size 3px). In the Brush panel, turn on Scattering and Shape Dynamics (you can play around with these settings to get different results).

In the Paths palette, right-click on the path layer and select "Stroke Path". It will fill the stroke with your active brush setting.
Tablet Drawing
Of course you can manually create the particle effect by brushing with various brush sizes. If you have a tablet, this will be fun. In the Brush panel, turn on Shape Dynamics, Scattering, or any other controls to Pen Pressure and experiment the results. If you don’t have a tablet, have fun clicking and dragging.

Technique 6: Color Dodge

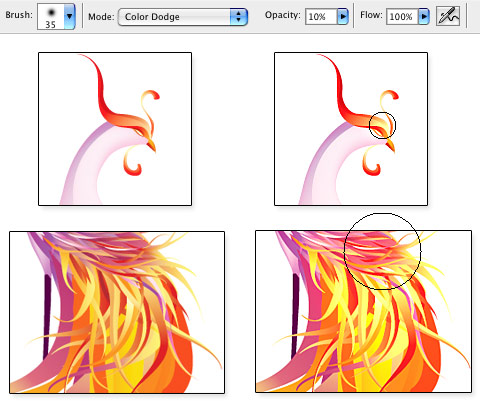
Vector artworks usually look very flat, by color dodging, you can bring up the contrast and create a focus point.
Paste your vector artwork in a new layer, use the Eyedropper tool and pick a bright color from the original image. Set your Brush mode to Color Dodge and brush Opacity 5 to 10%. Gentling click on the area where you want to be dodged. Be easy and try to over-dodge the image.
Technique 7: Blurred and Darkened.
As mentioned earler, vector artwork is usually very flat. You can add more depth to the image by blurring and darkening the background objects. Examples can be found in my Flow illustration. Notice the floral patterns in the background are blurred and darkened?
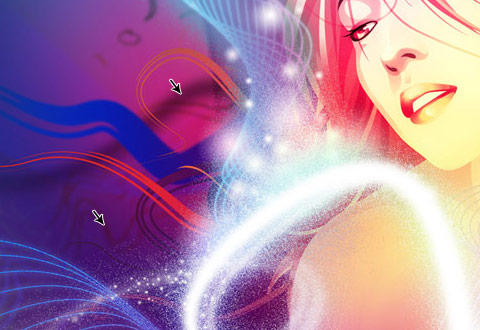
Just duplicate the foreground objects and apply 3 to 5px Gaussian Blur.
Technique 8: Watercolor
As seen on this site, watercolor texture and vector can mix very well together. Here is how I did the watercolor effects.
Choose any pastel colors, such as pink, green, purple, orange, etc. Select the Pencil tool, set the brush size to about 100px, Opacity 10%, and randomly draw on the layer.
Repeat this step for different colors. This technique is also posted in the previous tutorial, Watercolor Effect Menu.
Technique 9: Vintage
Here is a technique on how to create vintage effect to give more texture to your vector work. Although I have never used this technique in my illustration work, but I have seen it a lot. So, here is it.

Paste your vector artwork in Photoshop. Select the Erase tool, set the mode to Pencil, select one of the grunge/splatter brushes, and gentling erase partial of the layer.
Credits: The brush sets used here are splatter and watercolor, from Bittbox. The icons are from my free Christmas Holiday Icon Pack.
See more
You can browse my design portfolio to see more work by me. Some of my works are available for download as desktop wallpapers.

No response to “Vector Polishing Techniques”
Posting Komentar